As we know, Template is used for tracing an image. Before we start to draw a thing on Adobe Illustrator,a "Template" should be placed first,so that we can just easily trace an image we want to draw. It is very useful because it save our time and prevent us from making many mistakes.
How to create a Template?
Firstly, from the upper part of Adobe Illustrator, click "File”, then select “Place”. After that,select the image you want to choose.For me, I chose the symbol I sketched to make it become a template.
*Remember to tick the block beside written “Template” before you click “Place” (shown in diagram A).
Now, the Template will appeared on the screen of the Adobe Illustrator (shown in diagram B).
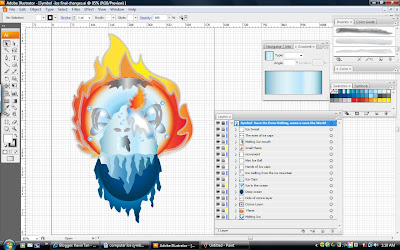
If you find that you want to change the Template image either becoming more brighter or darker,you are free to do so by simply just double clicking the layer of the template (show in diagram C), and layer option will be shown and you can see the words “dim image to 50%. From there u can retype the percentage of light you want.
 Diagram A
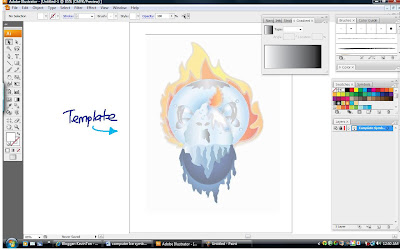
Diagram B
 Diagram C
Step 2- Drawing the Structure of Ice
Now with the present of Template, I can start to draw my Symbol.
Firstly, I used the Pen tool to draw the outlines of the Ice. After that, I used Direct Selection tool to adjust the anchor point of the structure until it is correctly shape correctly and looked like an Ice (same as the Template).

Step 3- Drawing the other structures of the Symbol
The Ice structure was adjusted into the correct position.
Then, I used Ellipse tool to draw another two big circles (size of it is based on the Template).
Based on the smaller circle,I used Pen tool to draw another structure that looks like melting ice (below the small circle) .
On the bigger circle,I drew another small oval shape on the upper part of it.
Then, I added some anchor point using Anchor Point Tool on the oval shape so that it can be easily adjusted into a shape as per picture below.

Step 4- Readjusting positions of all the structures
I used the Selection tool to adjust all the structures into correct positions as shown in the picture below. So, the Symbol has now taken shape but not fully completed.

Step 5- Making the Symbol more Alive and Dynamic
I used the same techniques,that is by using Pen Tool to draw two structures that looks like Ice hand.
I Pressed alt +drag the both structures to copy out another two similar structures.
After that,I selected two of the small structures, then Right Click, select Transform,then select Reflect. The symbol in the picture below have now two small structures reflected equally on both sides.
Ellipse Tool was used again to draw four small circles that represent Icicles (small ice).
Then, I used Pen Tool to draw a small structure that looks like melting Ice mouth.
The Symbol now looks more alive and dynamic with the use of metaphor.

Step 6- Using Paintbrush Tool to Draw
I used Paintbrush tool to draw the outline of the flame, the melting Ice,the eyes in the Ice Cap and the movement of the Ice hand in the Symbol. I chose to use this tool because the outline will look more natural and suitable as I have mentioned above.

Step 7- Finishing Move~ Colouring My Symbol
Finally,the most important step,Colouring. Basically I had formed my own colour swatches as indicated in the picture below before I added colour on my Symbol.
I used a few main colours in my Symbol such as, Blue,Yellow,Orange,Grey,Red and White.
In addition, I matched colour in my Symbol using Gradient. This picture below is the final image of my symbol.
I will explain the meaning of this Symbol (including the meaning of Colour and Shape) on the next post.
Thanks for spending your precious time to read my explanation on how I have drawn my Symbol...
From Kevin Tan,2008

No comments:
Post a Comment