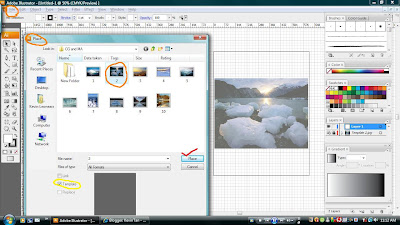
First, I am going to place the reference picture of Ice Cap and my complete sketches as my Template. The Template is very useful because I can easily use it to trace the outline of the Ice-Caps.
*Select File> Place> Choose the picture> select Template>>>Then, PLACE.
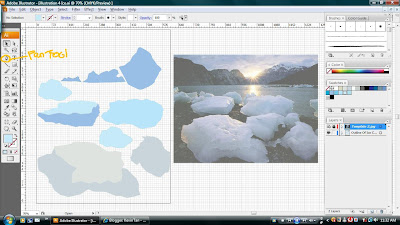
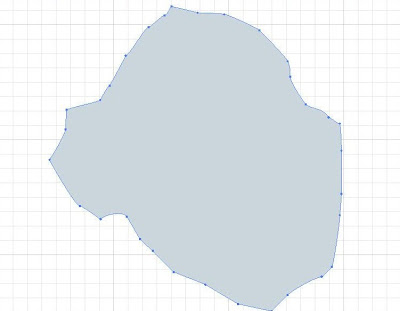
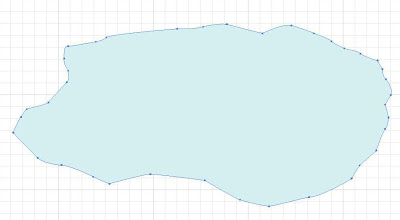
Step 2- Start Trace the Outline of Ice-Caps Using Pen tool
I used Pen tool to trace some of the structure of Ice Caps.
Step 3- Colour the Ice-Caps With the Help of Mesh Tool
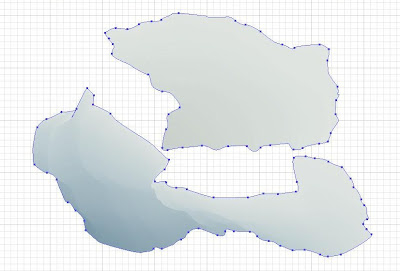
To make the Ice-Caps looks more realistic, naturalistic and well textured, I chose to use Mesh Tool. Mesh Tool allowed me to add point with line inside my Ice-Cap outline. The line added will make the Ice-Caps looks like 3D.
Firstly, I selected the Mesh Tool icon. Then, I chose one of my Ice-Caps and selected the suitable place to put mesh point. Examples below showed before and after I added the mesh point using Mesh Tool.
Examples of The Ice Caps
Ice-Cap 1
Before
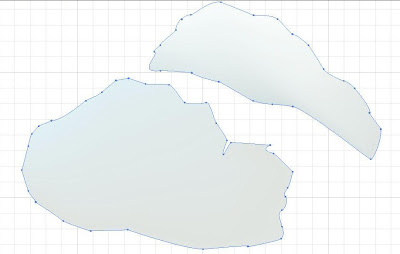
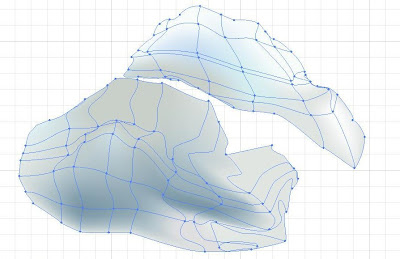
After
Ice-Cap 2
Before
 After
After 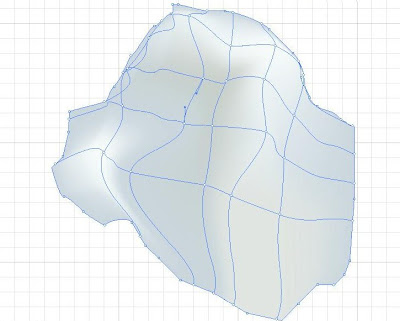
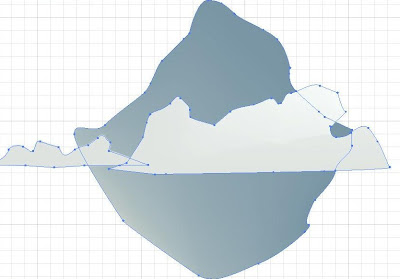
Ice Cap 3
Before
 After
After 
Ice- Cap 4
Before
 After
After 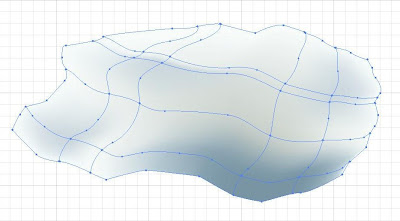
Ice- Cap 5
Before
 After
After 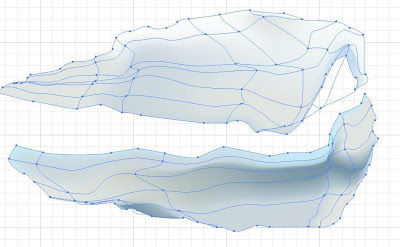
Ice- Cap 6
Before
 After
After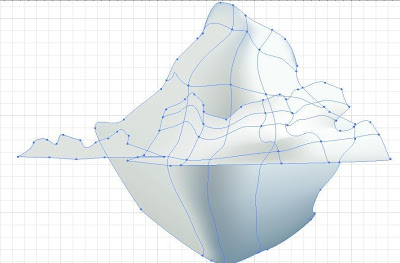
Diagram Below showed that all the Ice-Caps had been modified by me using Mesh Tool. It is quite interesting to use this tool as it will make your illustration looks very realistic and "cool" looking. At first this tool is quite hard to use as it was still new and unfamiliar for me. But after I kept on using it and try my best to learn it, suddenly I feel like I managed to use it wisely and accurately.
This Mesh Tool allowed us to adjust it mesh point by using Direct Selection Tool. So,whenever we are not satisfied with the location that we put the mesh point, we can just click any mesh point you like and adjust it to be higher or lower; and even adjust it to become more curve or round. Besides that, after you put the mesh point, you can just simply delete it, just hold the alt Key and click the mesh point u want to take out.
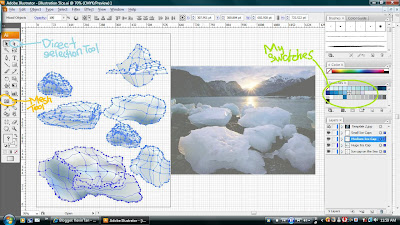
*Notice that the green words written " My Swatches". I had been creating my own personal colour swatches before I started to place colour on my Ice-Caps.This is because I knew that doing this will make it more convenient for me to choose the colour I would like to place on my Ice Caps. Besides that, using own self created swatches is much better as it will not confuse you on what colour you want to choose or you had chosen.
Step 4- Complete View of Ice-Caps
This is the personal swatches I used to colour my Illustration. Basically to make realistic colour tone and shading on my Ice-Caps, I chose to use ocean light blue, light grey-purple, light grey and mostly white or light-blue white.


Diagram on top shows the final view of my Ice-Caps. As I kept on adjusting and observing the suitable location to place mesh point and kept on observing and studying the shape and colour of the Ice-Cap, finally I managed to make a great improvement on my Ice-Caps.By using this Mesh Tool, we can easily match the colour of the Ice-Caps making them more beautiful and more structured.Finally, I had done and completed the illustration of Ice-Caps.
Step 5- Making Up The Background
Every illustration must have a background to enhance its beauty. A background also make the illustration looks more complete and perfect. Basically, in this assignment, I am just going to illustrate a simple background.
Both diagram below showed before and after on how I make improvement of my background.
I had divided the background into 3 part- The Blue Sky, The Sea and The Stone( ground).
*Using Rectangle Tool, I draw the Blue Sky and the Sea.
*Using Pen Tool, I draw the Stone (ground).
Before-
Firstly, I drew the rectangle by using Rectangle Tool.This is for the Blue Sky and the Sea. Then, I use Pen Tool to draw the Stone (ground).
 After-
 Then, using gradient to match the colour of my background.

This is the final view of my background.Now I can put my illustration of Ice-Cap into this background.
Step 6- Add Additional Small Ice- Caps
After I had done my background, I decided to put some small Ice-Caps as to make my background similar to the situation of the Artic. I chose to use Paintbrush Tool because I found that by using Watercolour Wet (one of the brush found in Paintbrush Tool ),I can illustrate simple small Ice-Caps easily and faster. The effects of Watercolour Wet looks similar to small Ice-Caps shape. This can be shown when you chose light blue colour for stroke and draw a short straight line using Watercolour wet.

Step 7- Finishing View
Without Symbol-
With Symbol-  This is the complete view of my illustration for Assignment 2. I will post my explanation about the melting of Ice-Caps and about this illustration on the next blog.
Thank You..

1 comment:
hi Kevin, very good job in explaining the mesh tool by putting the before and after. Good ya!
Based on the overall drawing, pls do not put the symbol at the centre? Do you really need to do so. Put it at the side. Also, pick up some good gradient of iceberg to be included. I see too many pieces already on the illustration, moreover, the pieces have too much constrasting colour. If you try to make the gradient colour on the iceberg slightly lesser, perhaps the overall look will be better. Hope this can improve slightly on your work.
Post a Comment